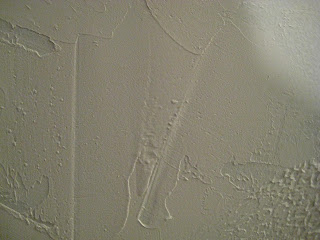
The first weekend in April, Dan spent 9 hours total texturing the walls. Doesn't he look like a pro? Thanks a TON to our friend Dan C. for holding our hand through most of these projects (window trim, texturing, painting)! He's a great teacher!
A couple close-up shots.
Before we even textured, we painted all the baseboards, door frames, and new window trim throughout the entryway, main floor hallway, living room, dining room, and kitchen. WHEW!!
My brother was a great helper. :)
The entryway trim took a lllllloooooooonnnnnnnngggggggg time!
Proof that I helped. (Editors note: it took quite a bit of convincing to muster up her courage to climb that ladder. I'm very proud of my acrophobic wife. You all should be too. Seriously though. She's awesome)
My siblings were also VERY helpful to entertain the kids in the basement during many hours of painting.
After the trim, we painted the ceiling. Isn't Dan's "uniform" sexy? ;) So much plastic everywhere!
The finished ceiling. Ooooooh. Aaaahhhh.
LAST came choosing a color. After 6 samples (two of these splotches are the same), we finally made a decision.
It's called "Grasslands" and we LOVE how it turned out!
He's having so much fun! (Painting in this lighting was the WORST!!!) We should have gotten the new light fixture BEFORE.
The entryway was tricky sometimes. (This picture is a perfect example of how NOT to reach that one last spot. Definitely NOT endorsed by OSHA) :)
Some of our other fabulous helpers (missing Jake Winegar). Thanks everyone!
Fini!!
When we finally pealed the tape off we were pretty disappointed how many touch-ups we had to do. But our friend told us it was perfectly normal. He gave us an awesome tip to use some tiny watercolor brushes and do the touch-ups freehanded. Worked like a charm!
Come on over. We'll give you a tour!


8 comments:
Awesome Job! It must be comforting to know that Dan could do well as a painter if his current carrier doesn't work out. :o)
Some of those pictures of Danny Boy are awesome to say the least! Love the color!!! Good on ya :)
Another tip, in case you have future rooms to tackle: When you put the tape on, seal the edge with the trim color. Just run a brush with the same color you're protecting over the edge, and that little bit of paint that leaks under will be the correct color. Then paint away with the new color. Equally important, always remove the tape while the last coat of color is still wet—i.e., paint the wall around a door and then remove the tape from the door trim before moving on to paint the rest of the wall. If you do these two things, you can have an entire room that needs no touch up at all. (Or less touch up?) But with an uncomplicated paint job, some people just prefer the touch up to the extra steps.
fancy, fancy! love the improvements. great windows, pretty paint. i need to a tour asap. xo
Looks GREAT!!! Good job everyone! :) Amazing that they had a white outfit for Dan WITH his name on it!!! And a U on the back....I bet he was excited. ;) haha. (there was sarcasm used there, I know he drew it on) I can't wait to see it all!!! YAY!!
so great! It looks awesome. Congrats!
Looks marvelous! Painting is such hard work...I had no idea how labor intensive it was till we got started! All the trim work and doors! But it's so fun to look at when it's all done :)
It looks AWESOME, and I loved the action shots especially! Way to go!
Post a Comment